Integrate Whatsapp With Open A I G P T3
Integrate WhatsApp with OpenAI's GPT-3
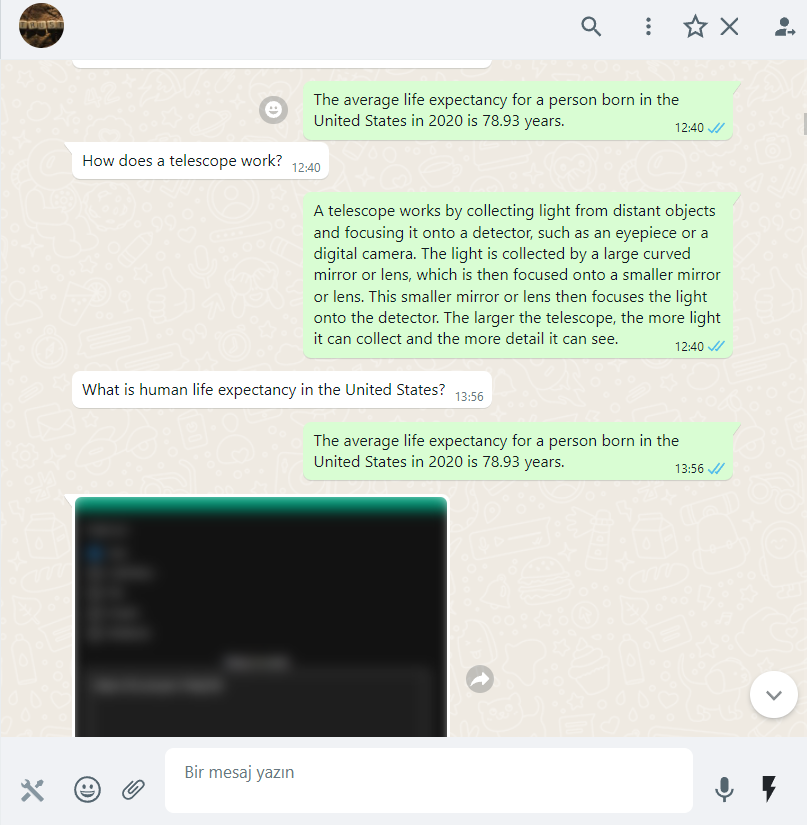
WhatsApp can have a number of benefits when integrated with a chatbot. By automating customer service requests, it can help companies provide faster service to their customers. Additionally, by providing OpenAI's natural language processing capabilities, the chatbot can help customers receive accurate responses to their inquiries.
Kobikit Sidekick's webhook system with the built-in smart reply system helps you easily integrate with any third-party chatbot system, with only a few clicks. Please follow the 3 simple setups below to get a fully working GPT-3 integration with your WhatsApp account.
-
Setting up OpenAI's account
-
Sign up for OpenAI's API and login into the dashboard
-
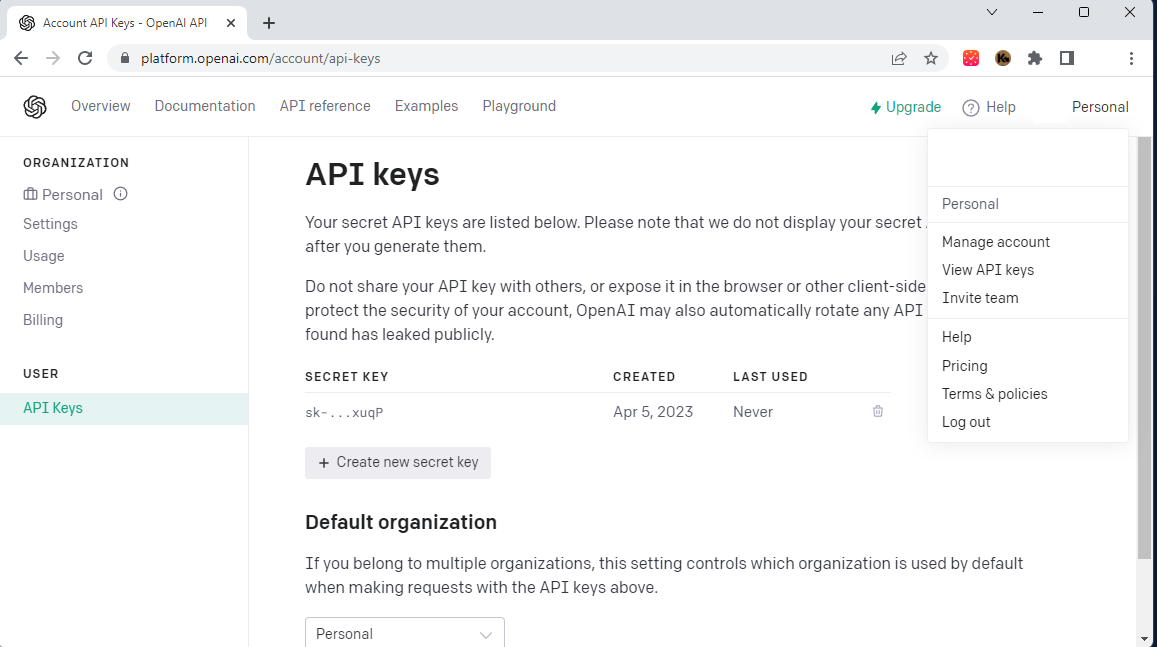
From the top right corner, hit your account's name and navigate to "View API keys"
-
Create a new API key, copy it, and keep it somewhere safe, we will use it in the next step
-
From the top of the page again, navigate to "Examples" and choose the service you want to integrate with, let us try the "Q & A" service, which "Answers questions based on existing knowledge", as they described.

-
Scroll down to the "API request" section, change the code from "curl" to ["json"], and copy the code snippet and keep it somewhere safe too, we will use it in the next step.
-
-
Setting up the webhook
-
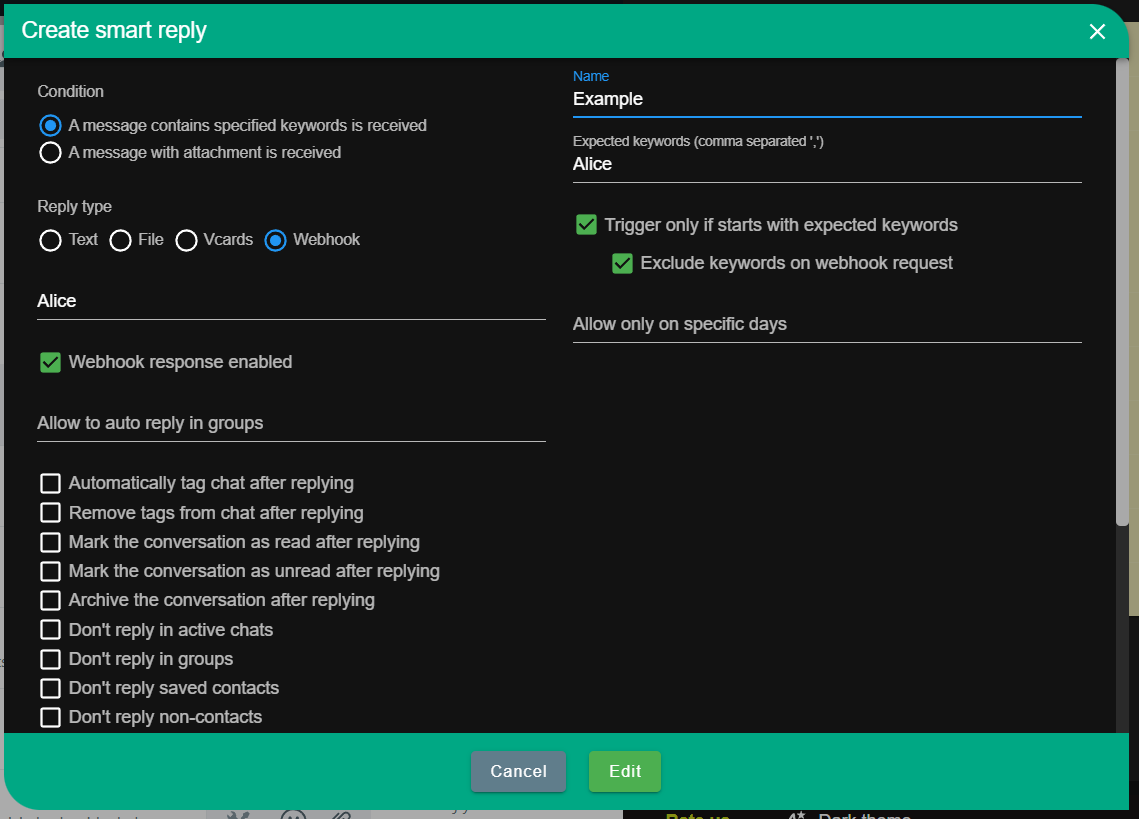
Go to your WhatsApp Web page, open Sidekick Tools and navigate to the webhooks tab, then create a new webhook.
-
Give your webhook a name, and fill in the other fields:
-
Webhook URL: https://api.openai.com/v1/completions
-
Webhook Headers: {"Authorization": "Bearer your-api-token"} - Replace your-api-key with the key we saved before at the first step.
-
Enable "Customize Webhook Payload"
-
Paste the json code snippet that we copied in the previous step
-
Delete the "prompt" property content then type "{message_content}"
-
Fill the "Message content parameter" as: choices[0].text

-
Make sure to replace the \n with # in the "stop" parameter.
-
If your webhook setup looks like the screenshot above, you're fine and ready to move to the final step.
-
-
Setting up the Smart Reply
-
The "Smart Reply" is the event listener that will capture the incoming messages and forward them to the webhook. Let's set up a simple workflow that represents our chatbot, let's name it "Sidekick" and let us listen for any message that contains "Sidekick" to trigger this workflow.
-
The smart reply will simply "Send event data to a webhook", pick the webhook we just created before, and make sure you tick the option that returns the webhooks responses to the sender.
-
All set now! Let's test how it goes.