Kobikit Sidekick WhatsApp Assistant Tutorial
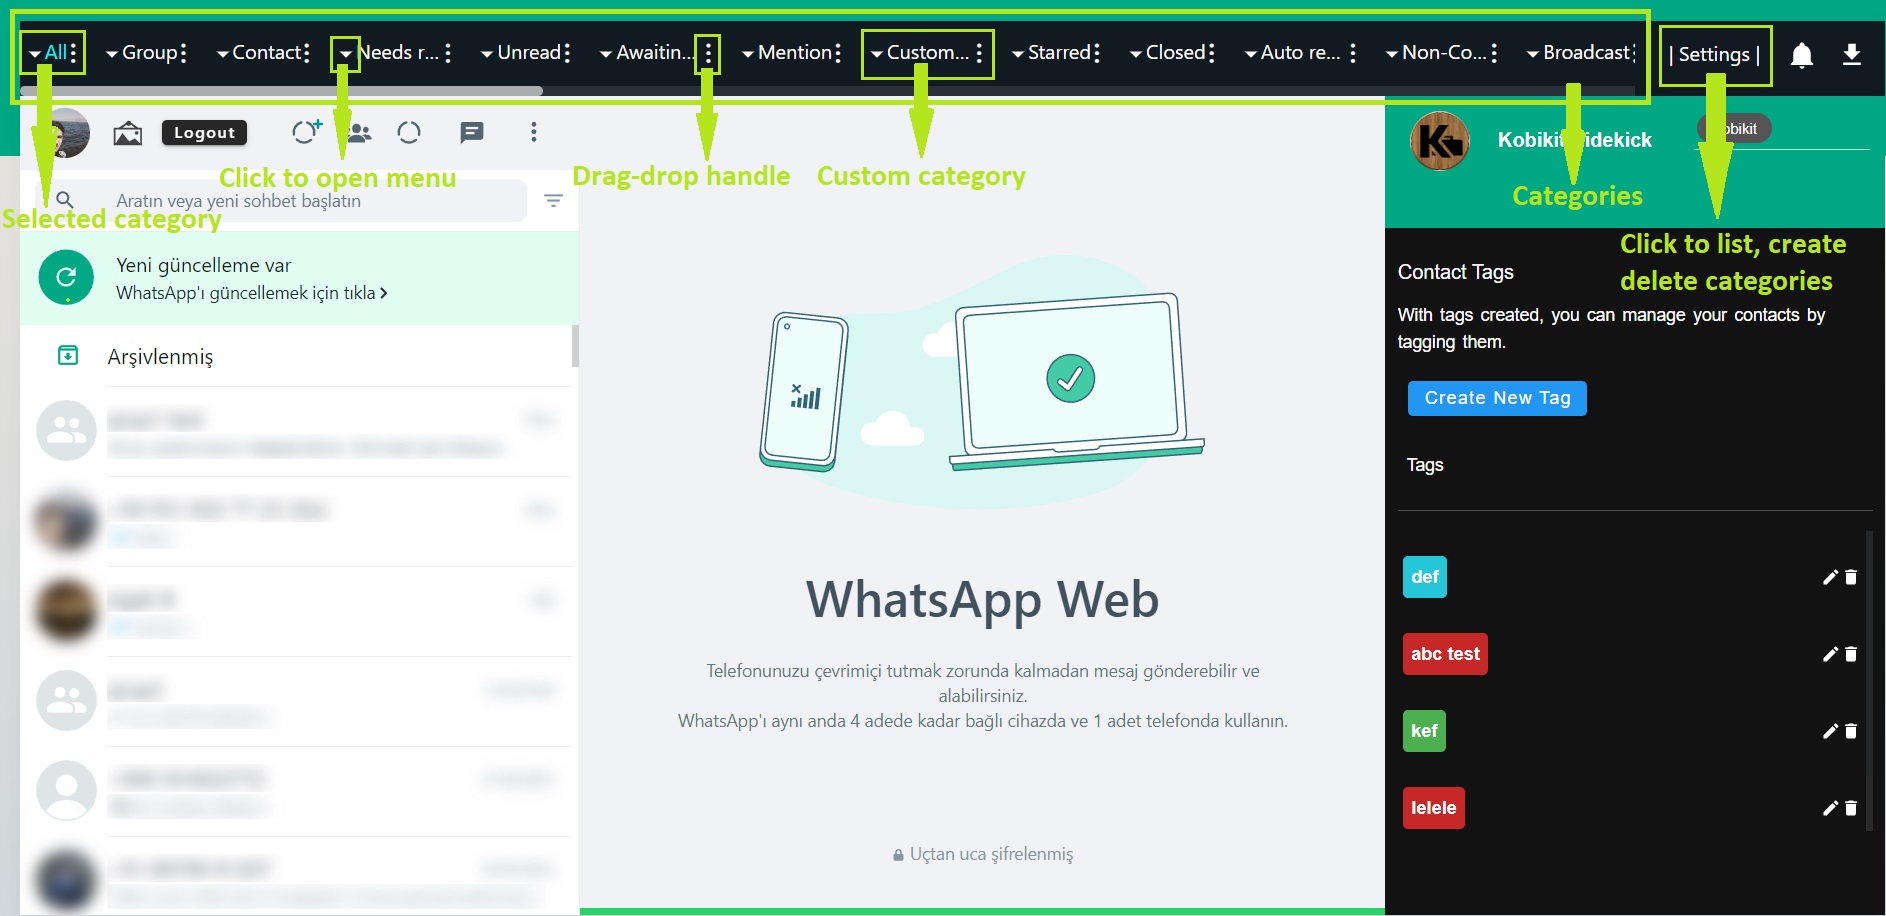
Categories
There are three types of categories:
Users can create custom categories and use existed categories. New categories can be added, edited, deleted.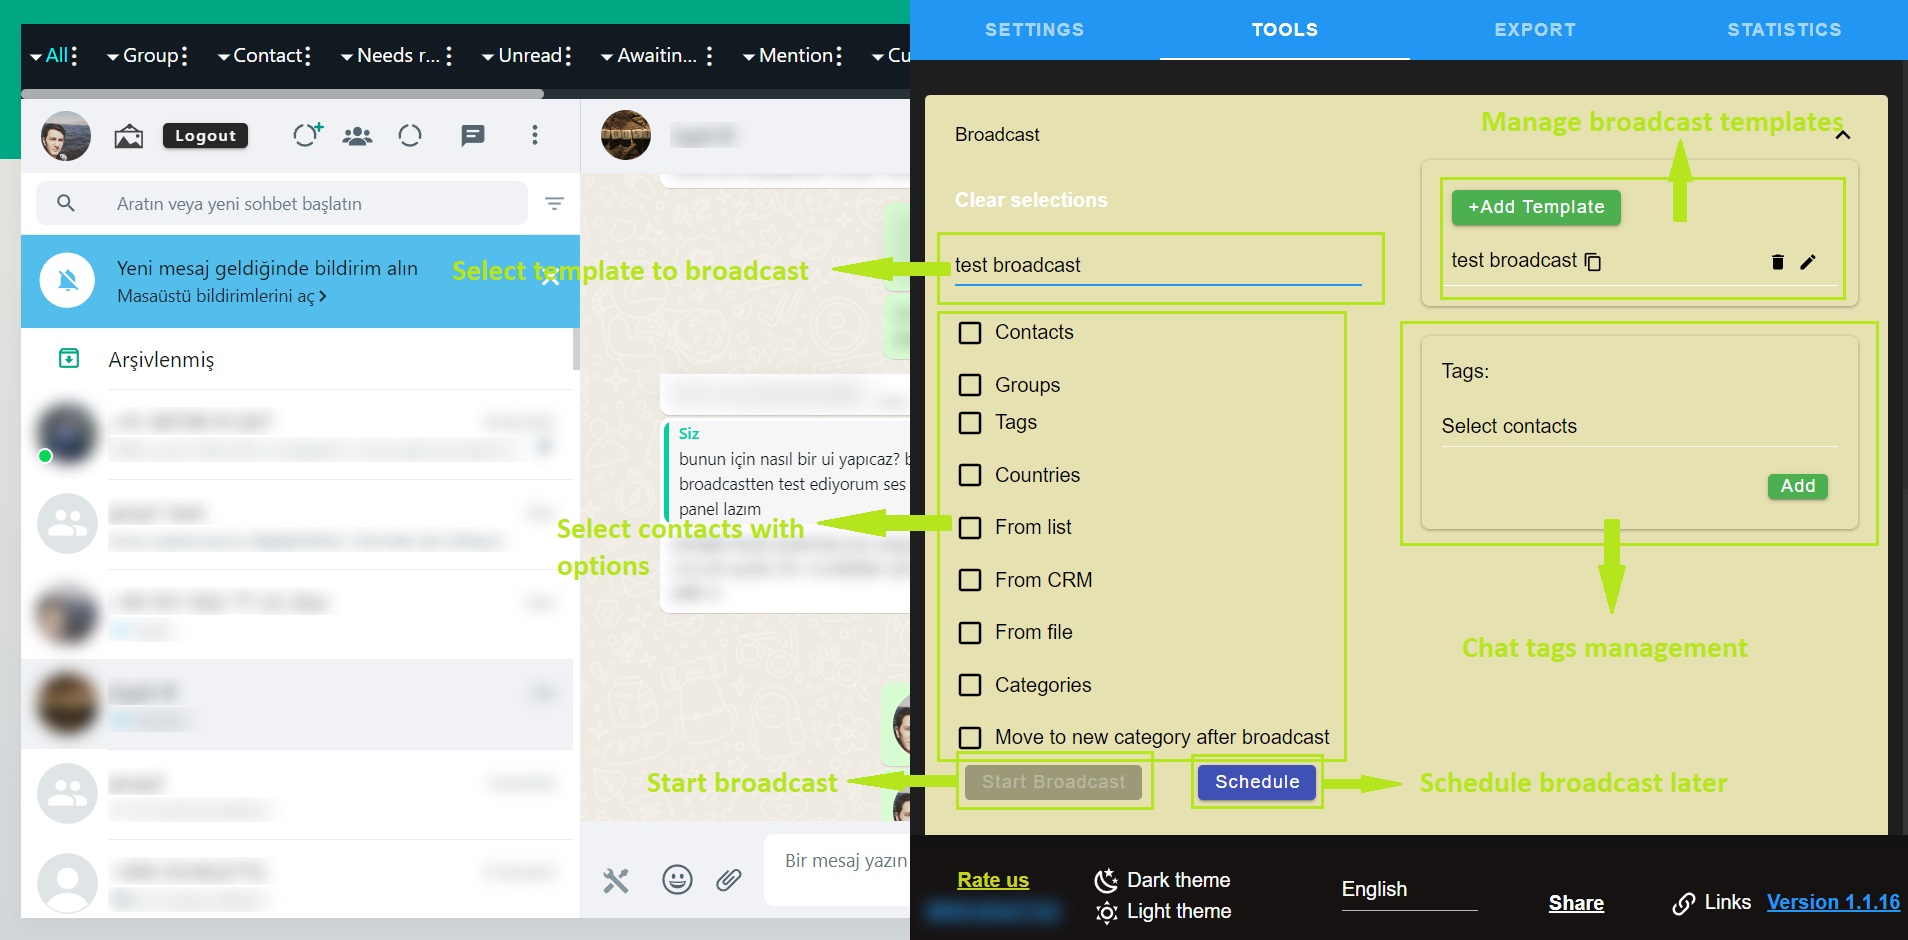
Broadcast
Click Add Template button to create a new template.
Select the template you created from Select template dropdown menu.
Select contacts using various options. You'll see how many target chats you selected near the option.
If you want to start now click Start Broadcast button or click Schedule button to schedule it later.
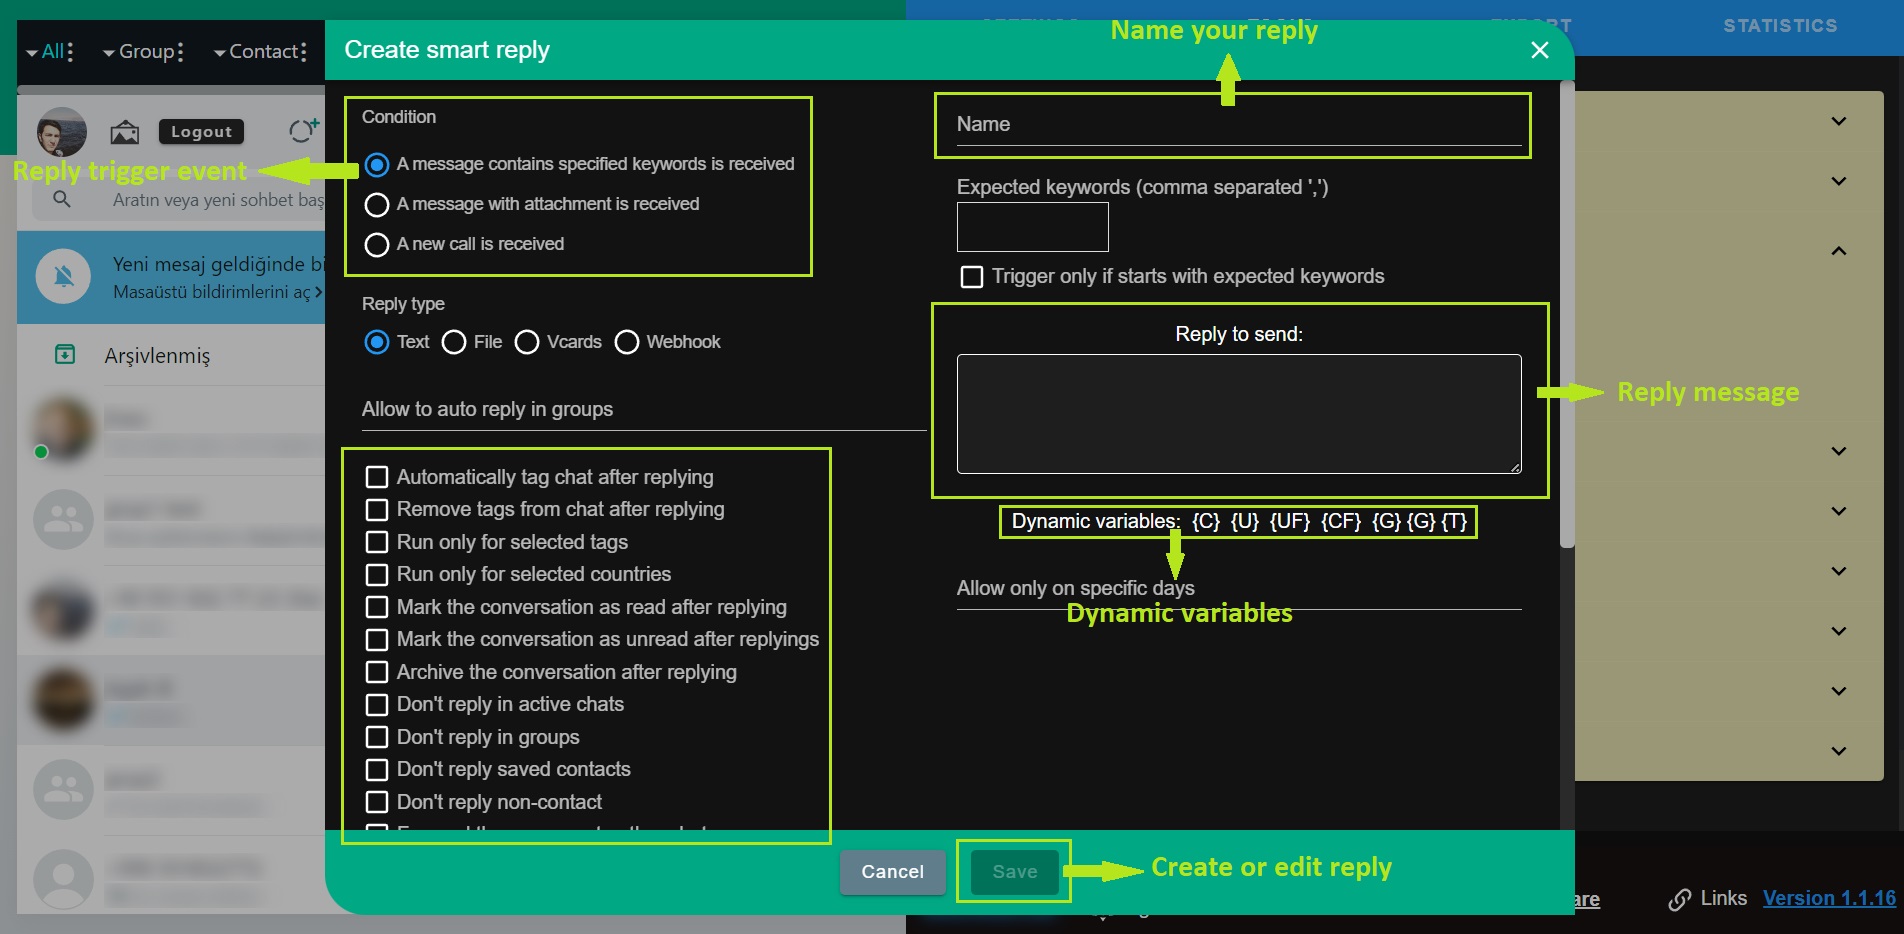
Smart reply
Smart replies let you create triggers for events like on message received, on status posted, on phone call etc. You can create a smart reply following Tools > Smart Replies > Create Smart reply button.
Opening panel show you various options to manage your smart reply. Firstly select a trigger on the top-left Condition. It's when your smart reply triggered. Then select a reply type. It can be a text message or file response. Depending on your selection you'll see options on the left. If you select Text, you need to set expected keywords and the text reply message.
After the type there are many options for the smart reply. These options configure your smart reply when it'll work or set actions after reply executes like tagging the chat, delete the chat add chat to a group or remove grom group etc.
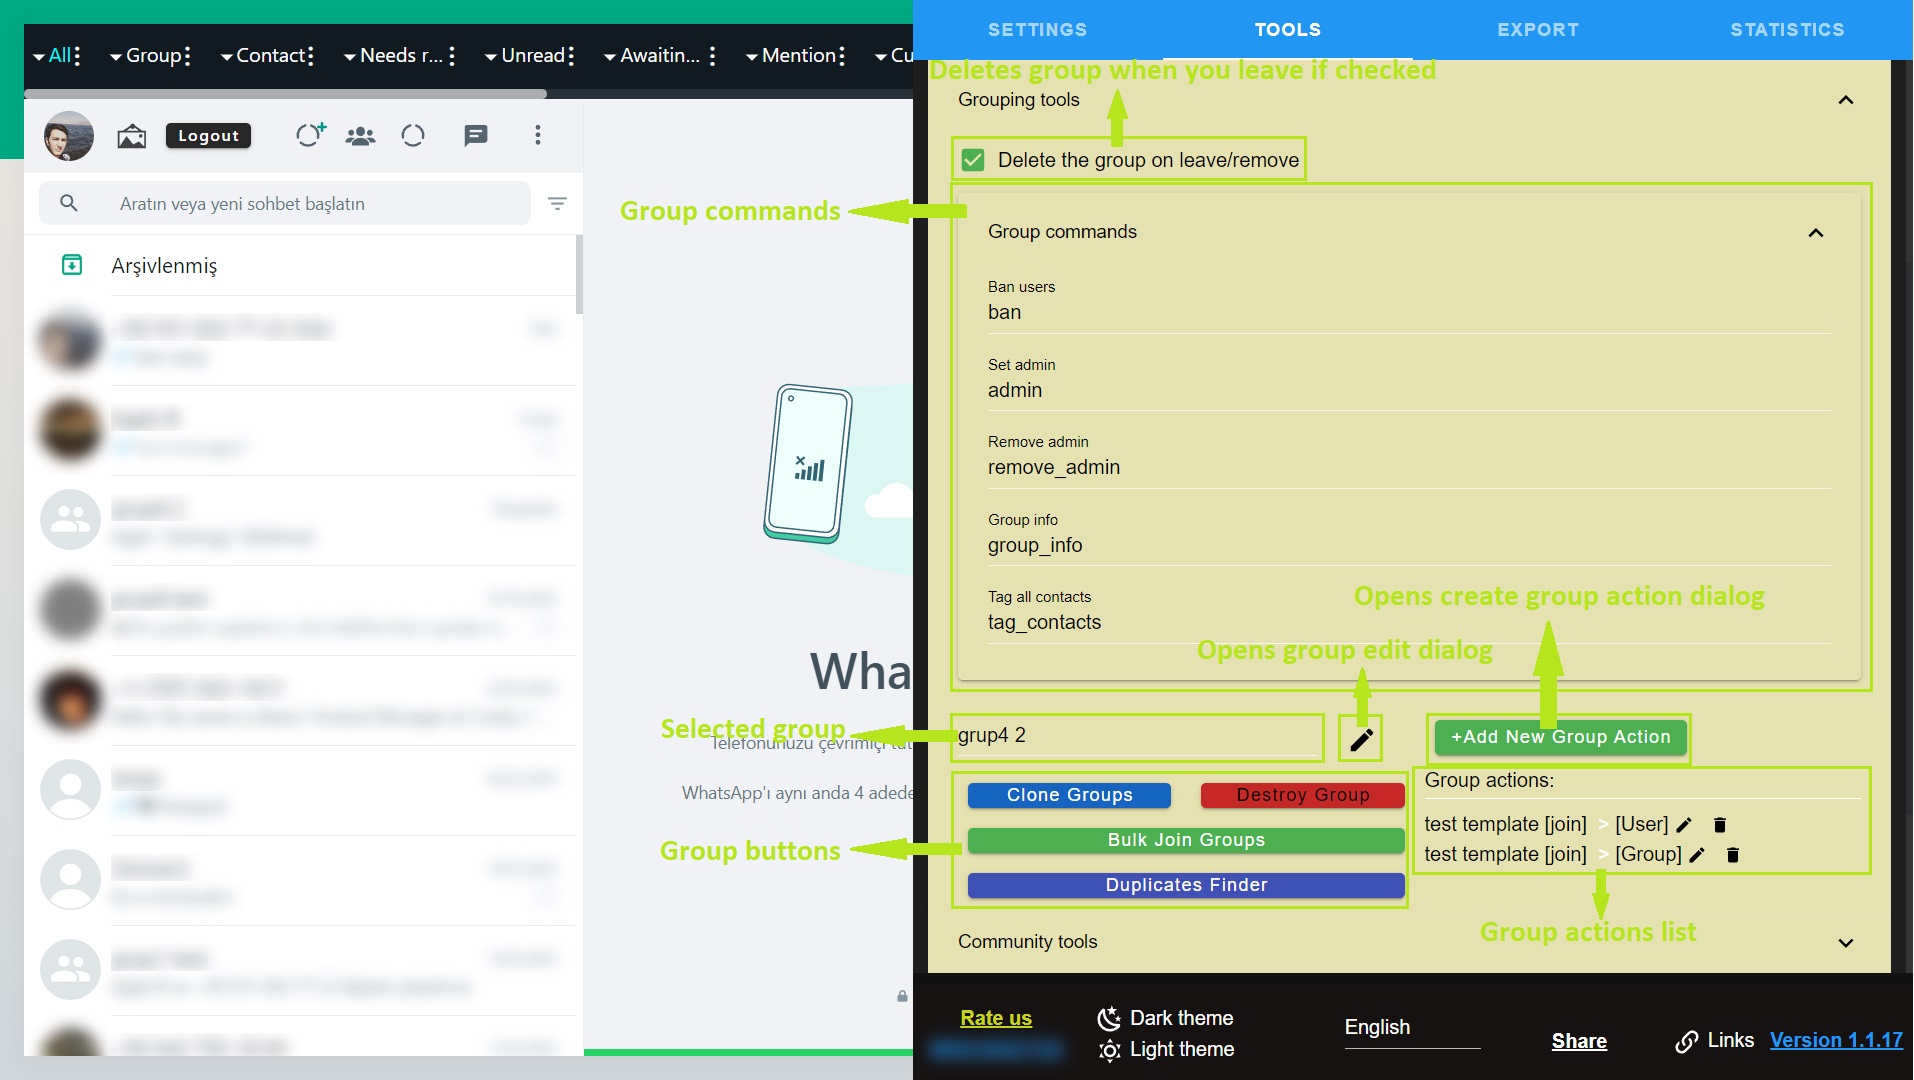
Grouping commands usage
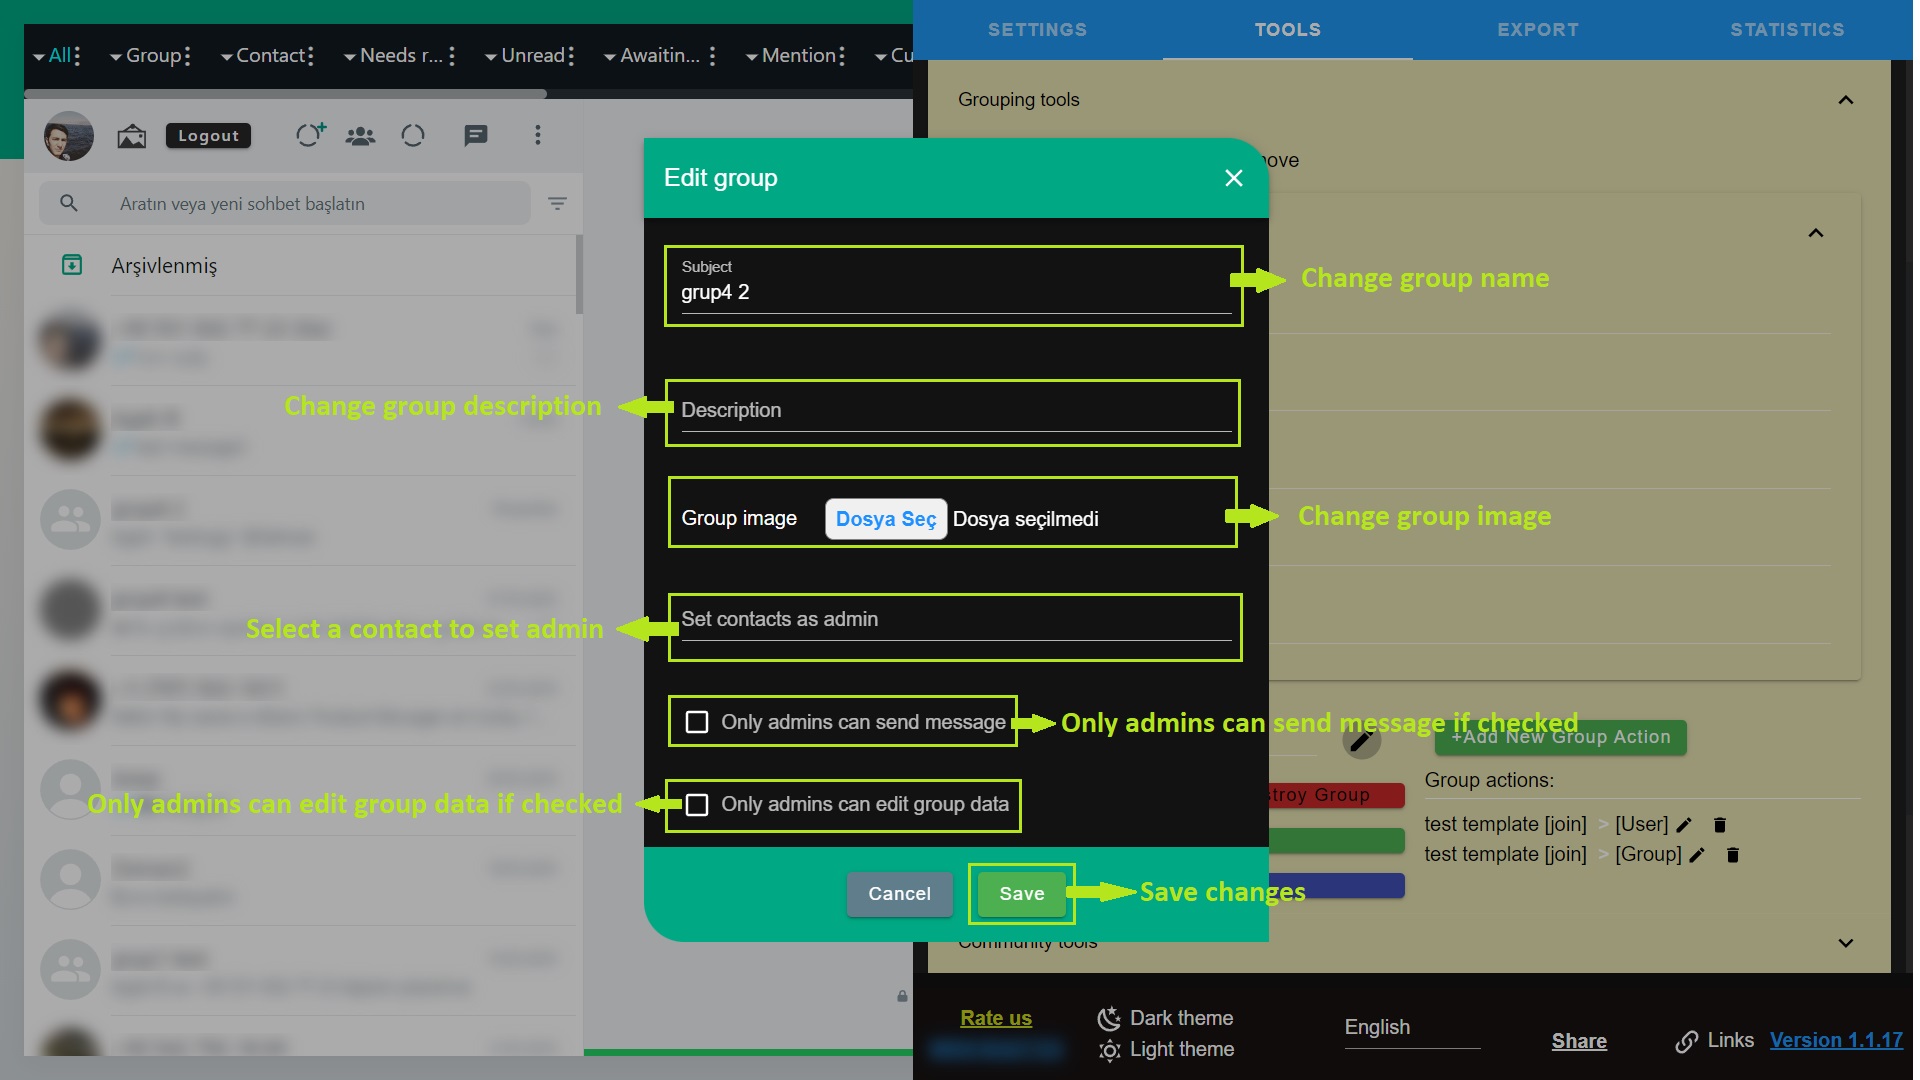
Group edit dialog
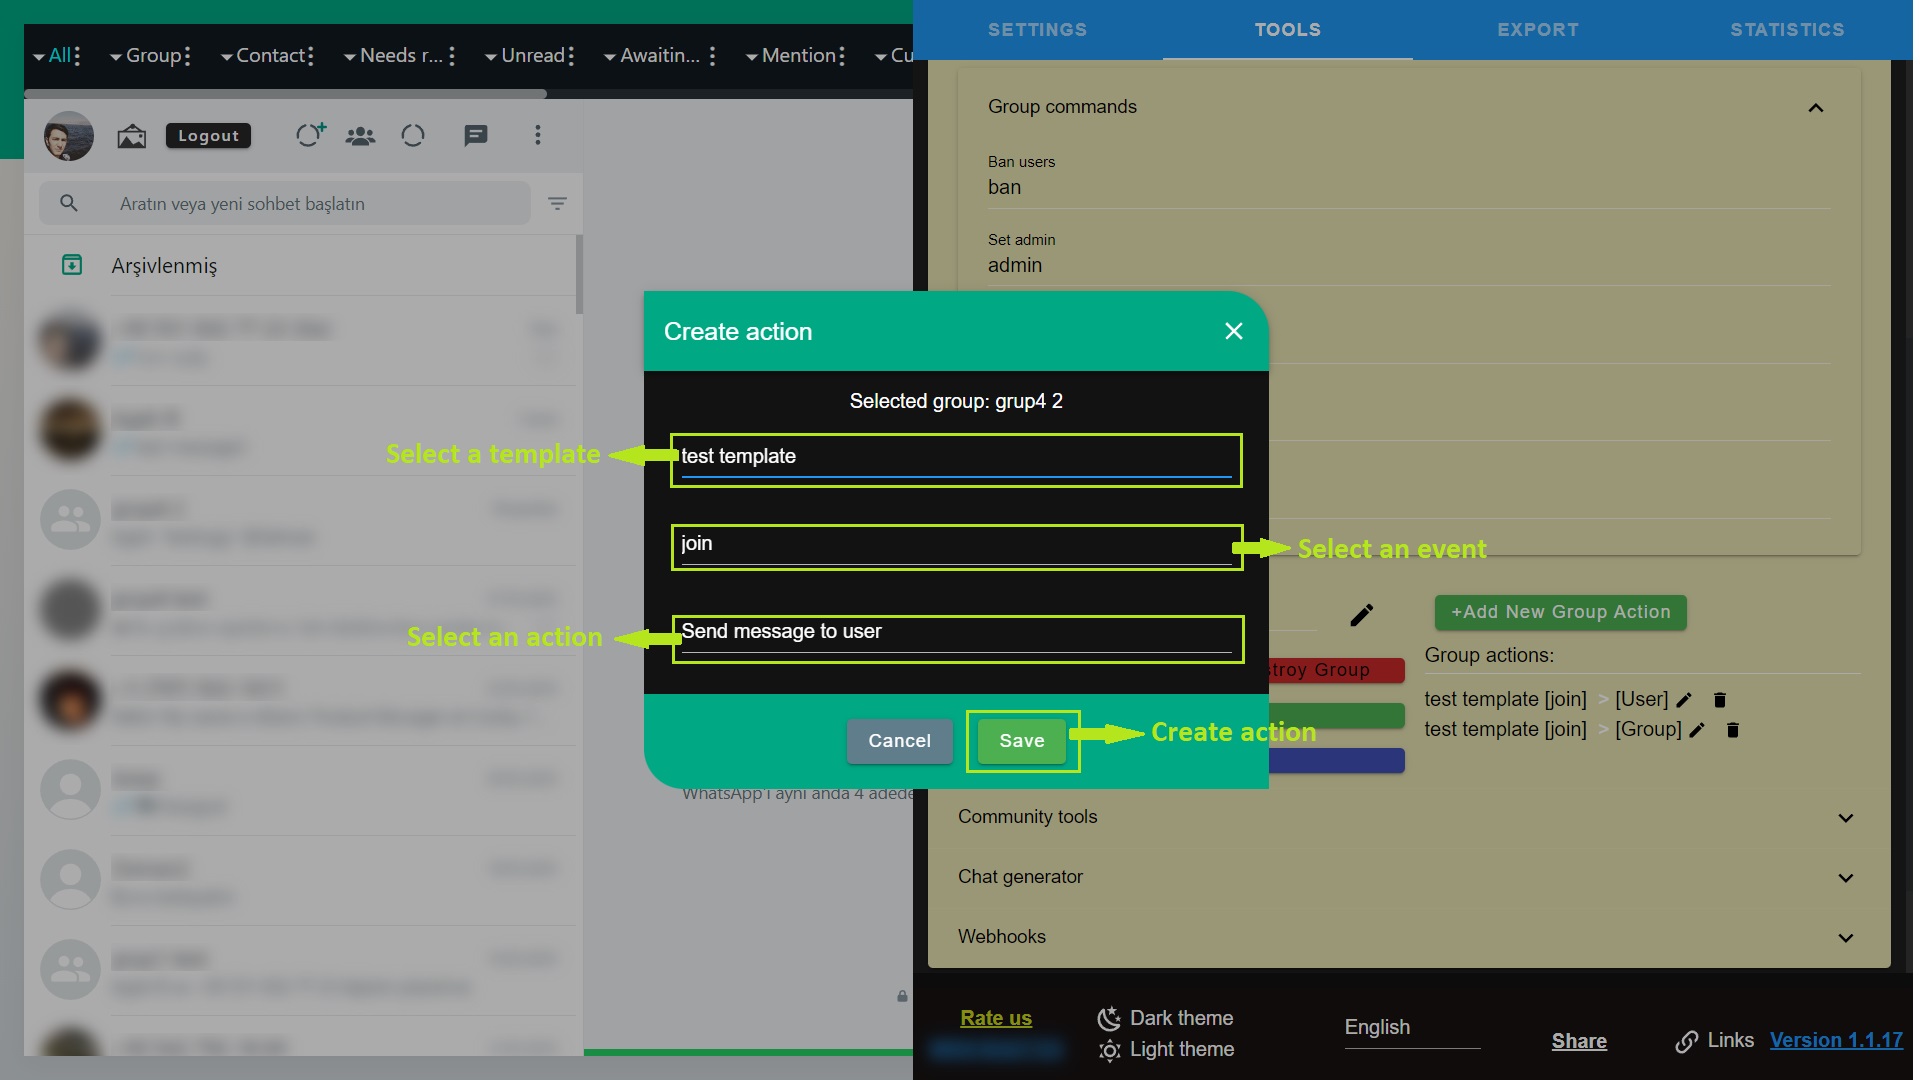
Create action dialog
Grouping tools
Select a group before create the event
Click the +Add New Group Action button. It will open a group action modal window.
Select a template. You must have a template to use this feature. Read Using broadcast if you don't know how to create one.
There are many commands for groups. Group admins can use group commands and only can be used in the groups where the user is admin. The commands can be changed under Group tools panel. These commands are; ban, admin, remove_admin, group_info, tag_contacts
-
ban: remove a user from group
usage: "ban @contact" -
admin: promote a contact as admin
usage: "admin @contact" -
remove_admin: remove admin permission from contact
usage: "remove_admin @contact" -
group_info: return some statistical data about the group
usage: "group_info" -
tag_contacts: tag all contacts in the group
usage: "tag_contacts" or "tag_contacts {some_text}"
Select one of the events.
Join event triggered when someone joined the group. Leave event triggered when someone leave the group.
Select one of the actions.
If you select Send message to user, template text will be sent to user when the event occured. Otherwise the message will be sent to group if you have selected Send message to user.
The created action will appear as below;

Webhooks
There are two type webhooks: outgoing webhooks and incoming webhooks.
You need a webhook url and type a name for the webhook to create outgoing webhook.
Outgoing webhook fields are Url, Headers, Method, Body and Message property. You can create an outgoing webhook to click Create button after name webhook and fill these fields.
Name and Url fields are required. Other fields Header, Body, Message property are optional. You configure it considerin your webhook.
The Message property field allows you to pull the data you want from the webhook response.
Incoming webhook has only Name field. You can create an incoming webhook just selecting webhook type incoming and create.
Incoming webhook
Chat tools
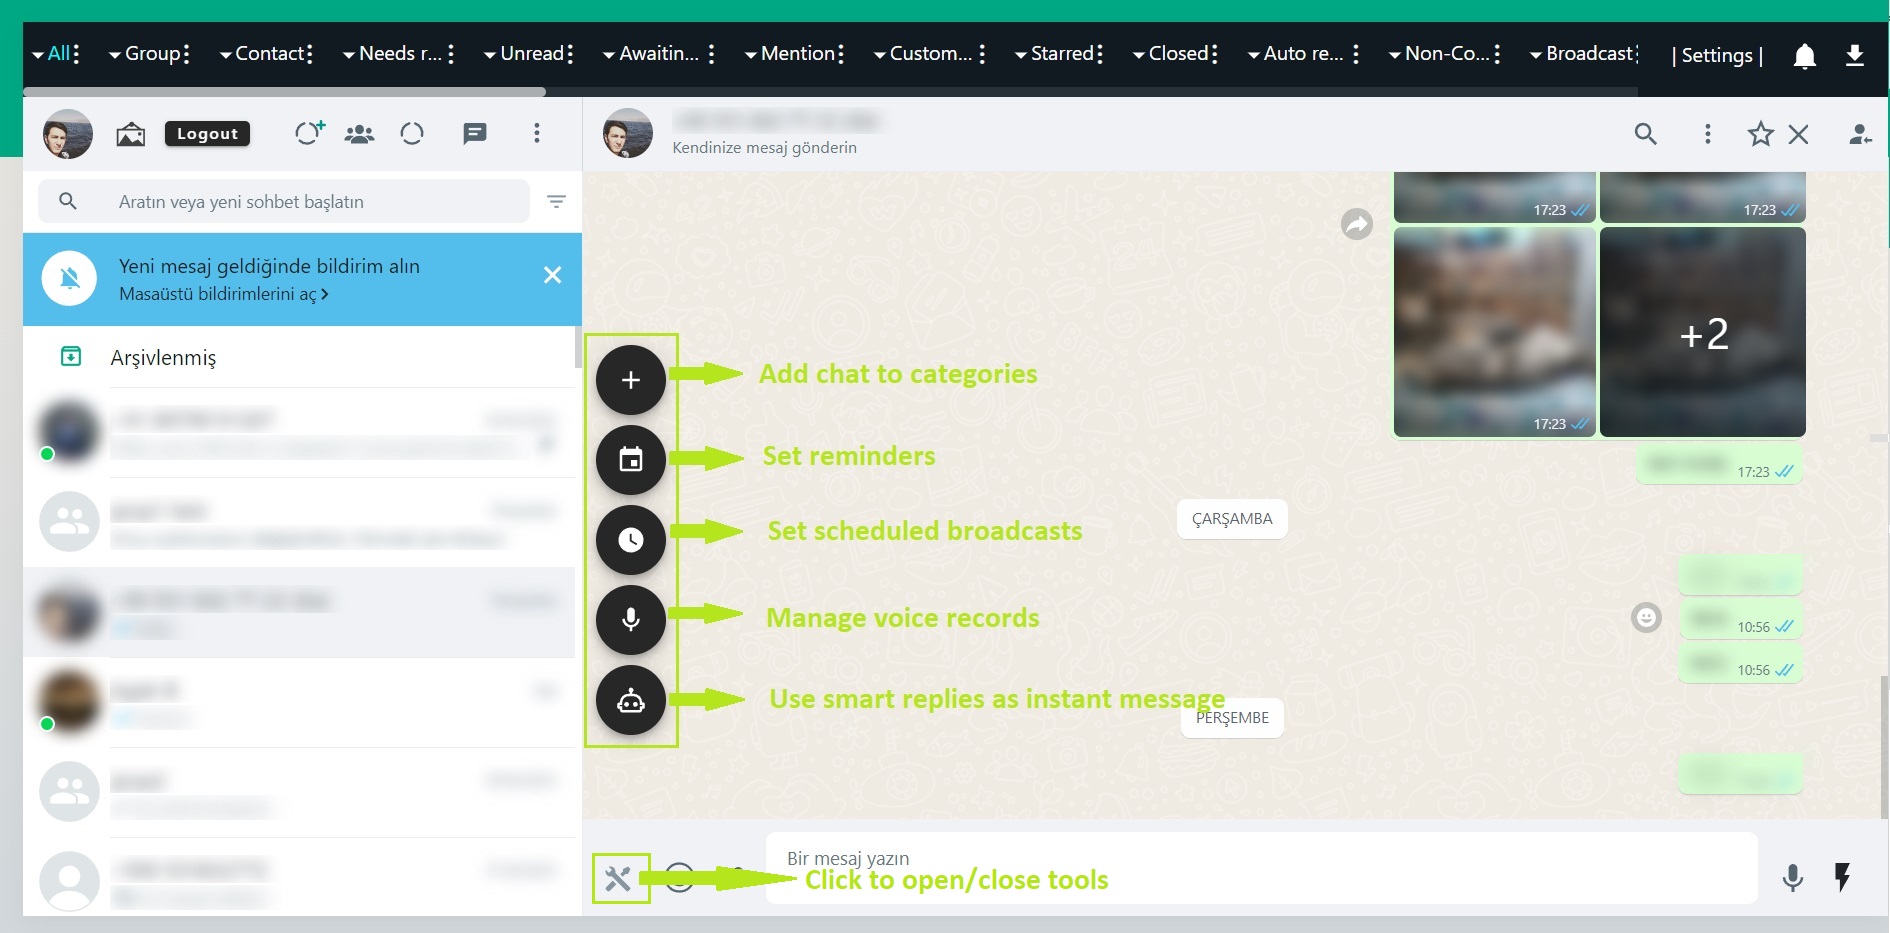
Click to open/close chat tools
Add chat to categories: click to open modal that you can add active chat to categories.
Set reminders: you can create reminders for the active chat.
Set scheduled broadcasts: you can create schedule messages for the active chat.
Manage voice records: you can send sound files as voices to active chats. The file must be .OPUS
Use smart replies as instant messages: select a smart reply and send to the active chat.
Scheduled messages
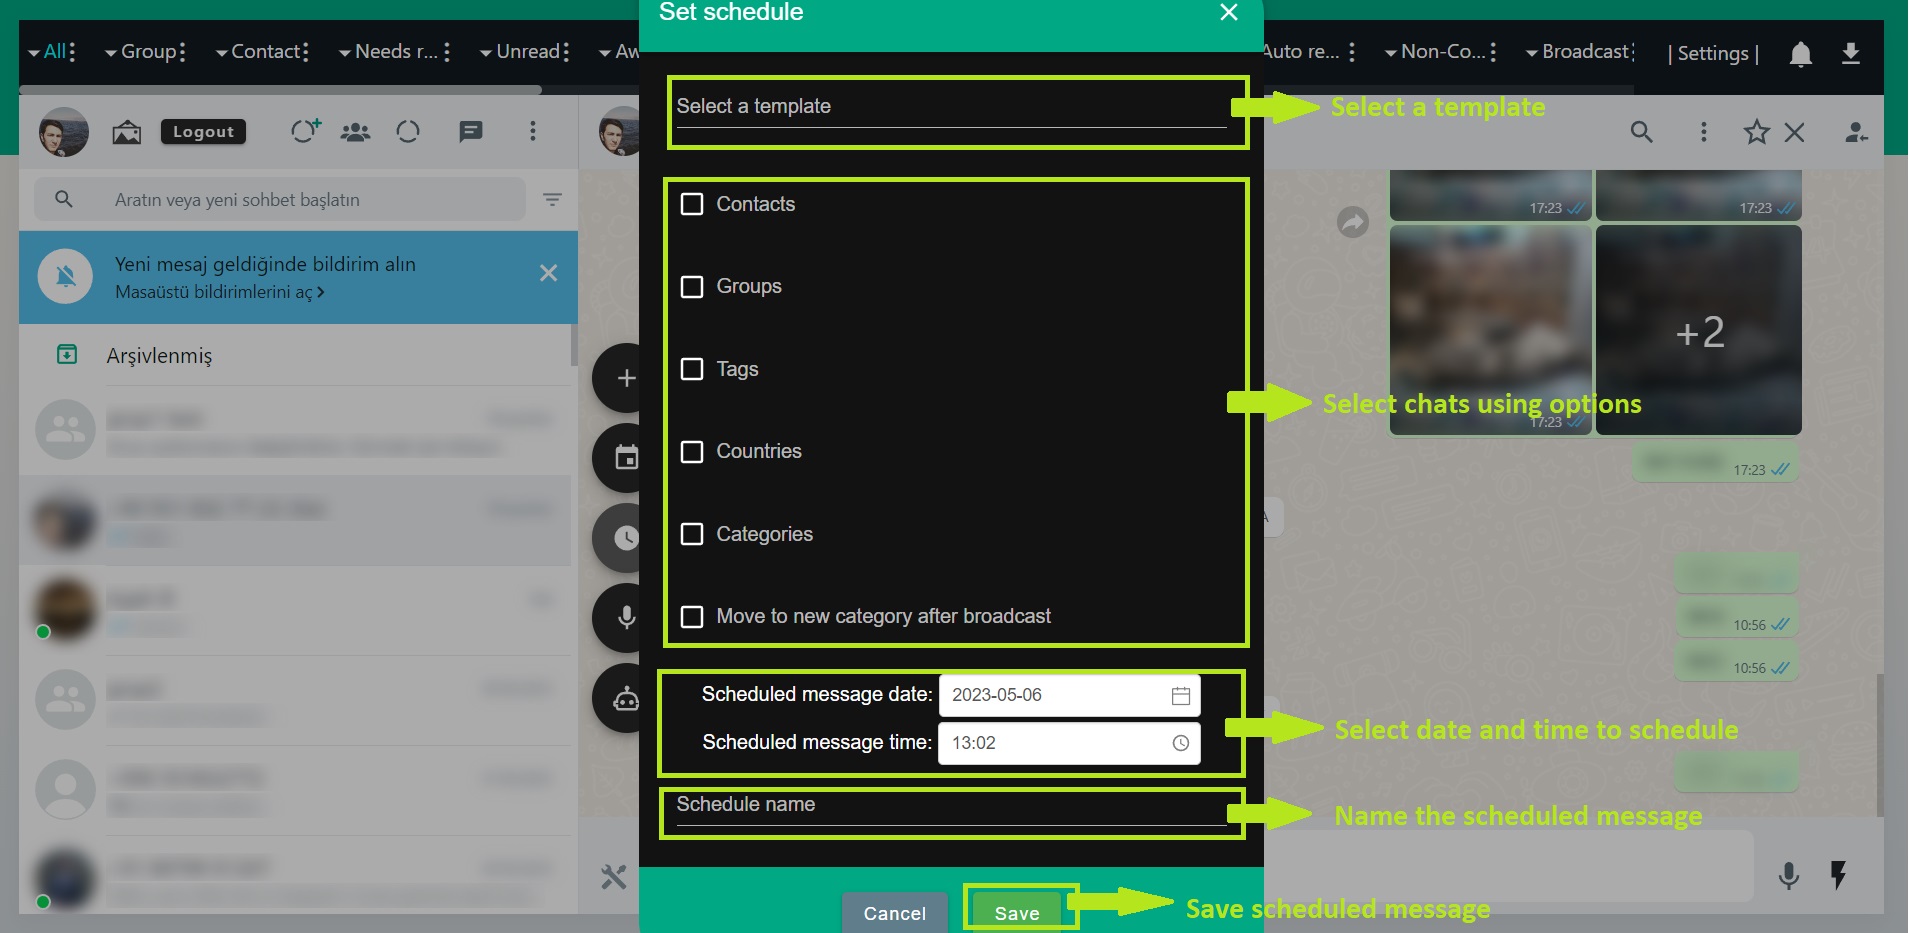
Click third button to open set schedule modal.
Select a template then select chats using options.
Set schedule date.
Name the scheduled message.
Save the scheduled message.
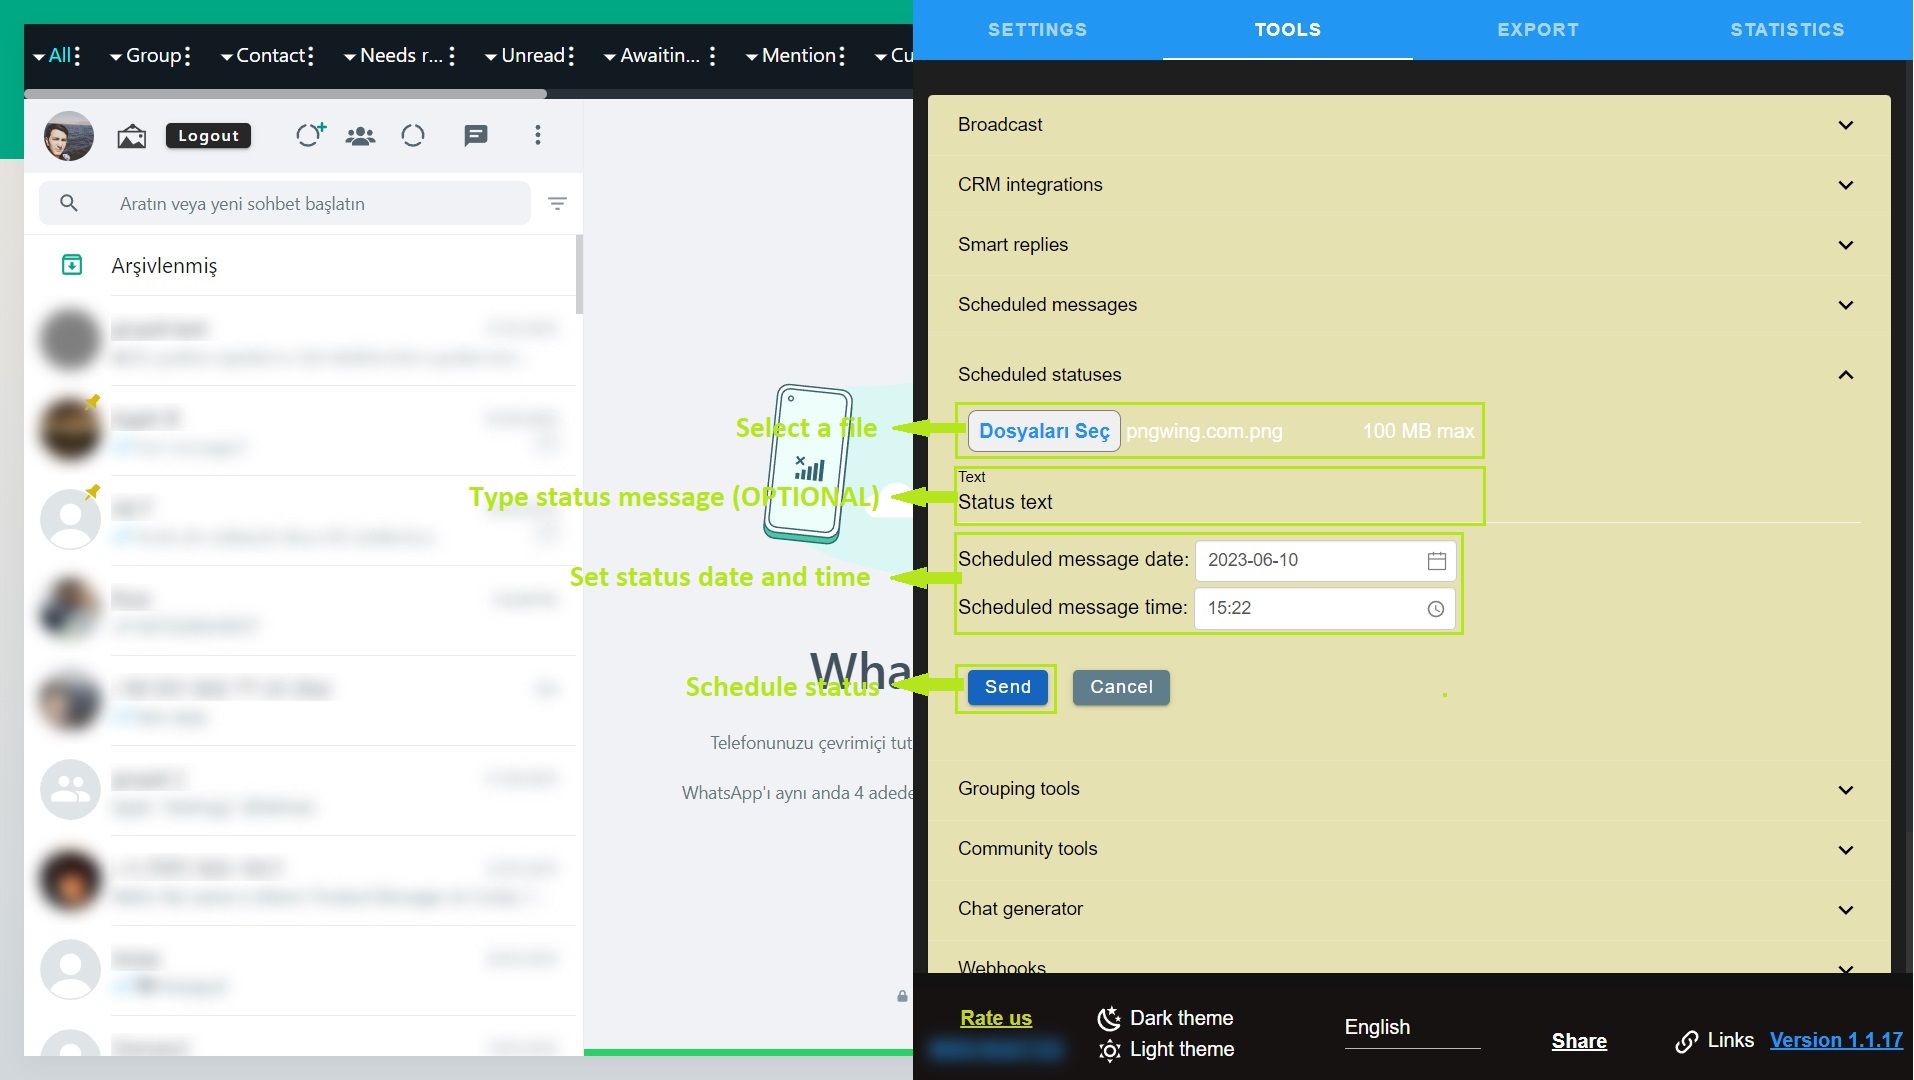
Scheduled statuses
Scheduled status let you create status then send it at the appointed time
First, select a file to create scheduled status.
Type a text for status if you want
Set schedule date and time.
Click the "Send" button after you've done all this.
Your scheduled status will be on the list.
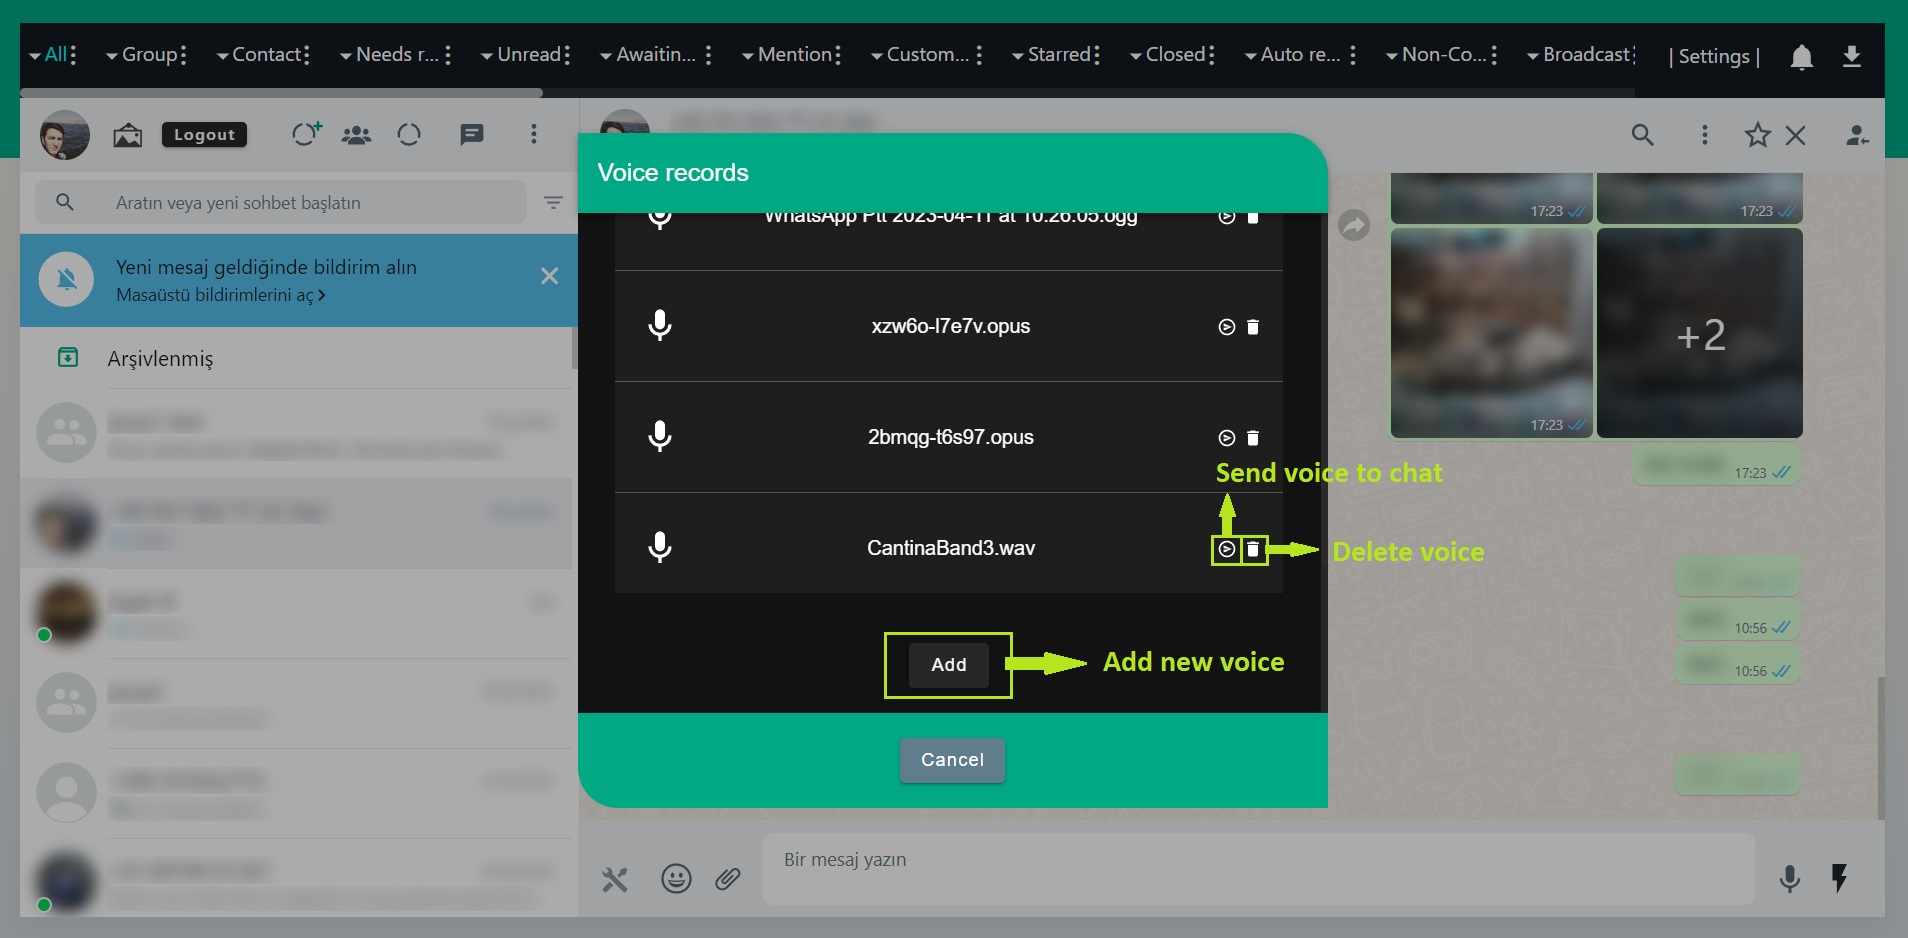
Voice records
You can send sound files as voices to active chats.
Click "Add" button to upload new file. File must be .OPUS
Click run icon to send sound as voice to the active chat.
Click delete icon to remove voice.
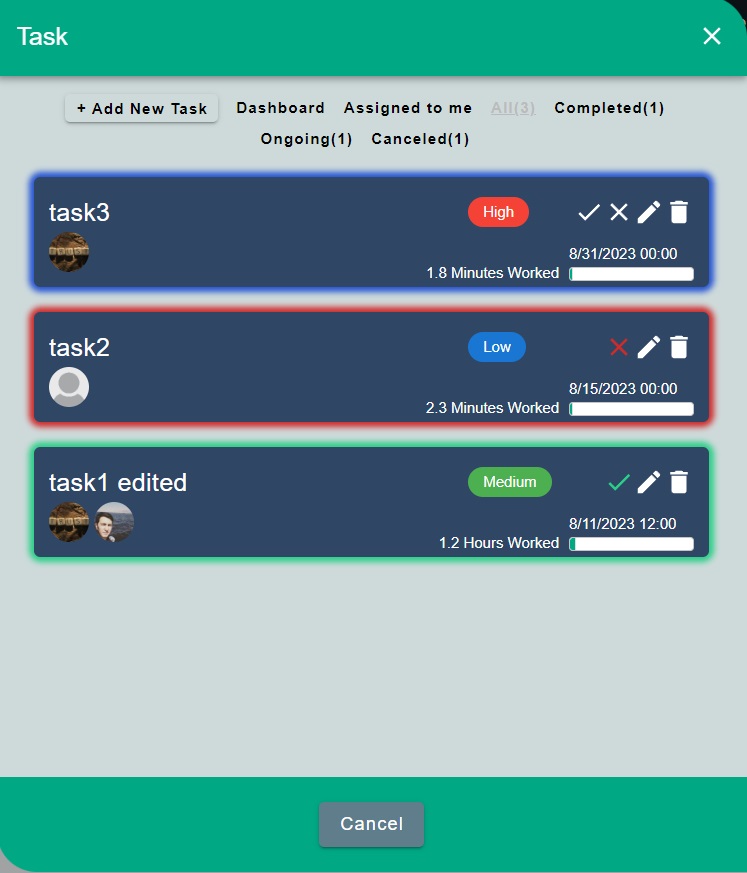
Tasks
Tasks feature let you assign tasks to your contacts.
Tasks can be created from both task modal window and sidebar by clicking + Add new task button.
You should select at least one contact to assign. Also viewers can see tasks but cannot edit.
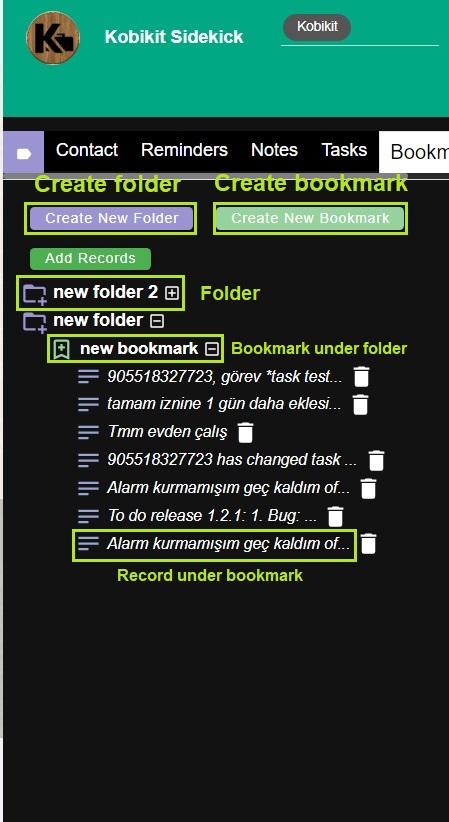
Image 1
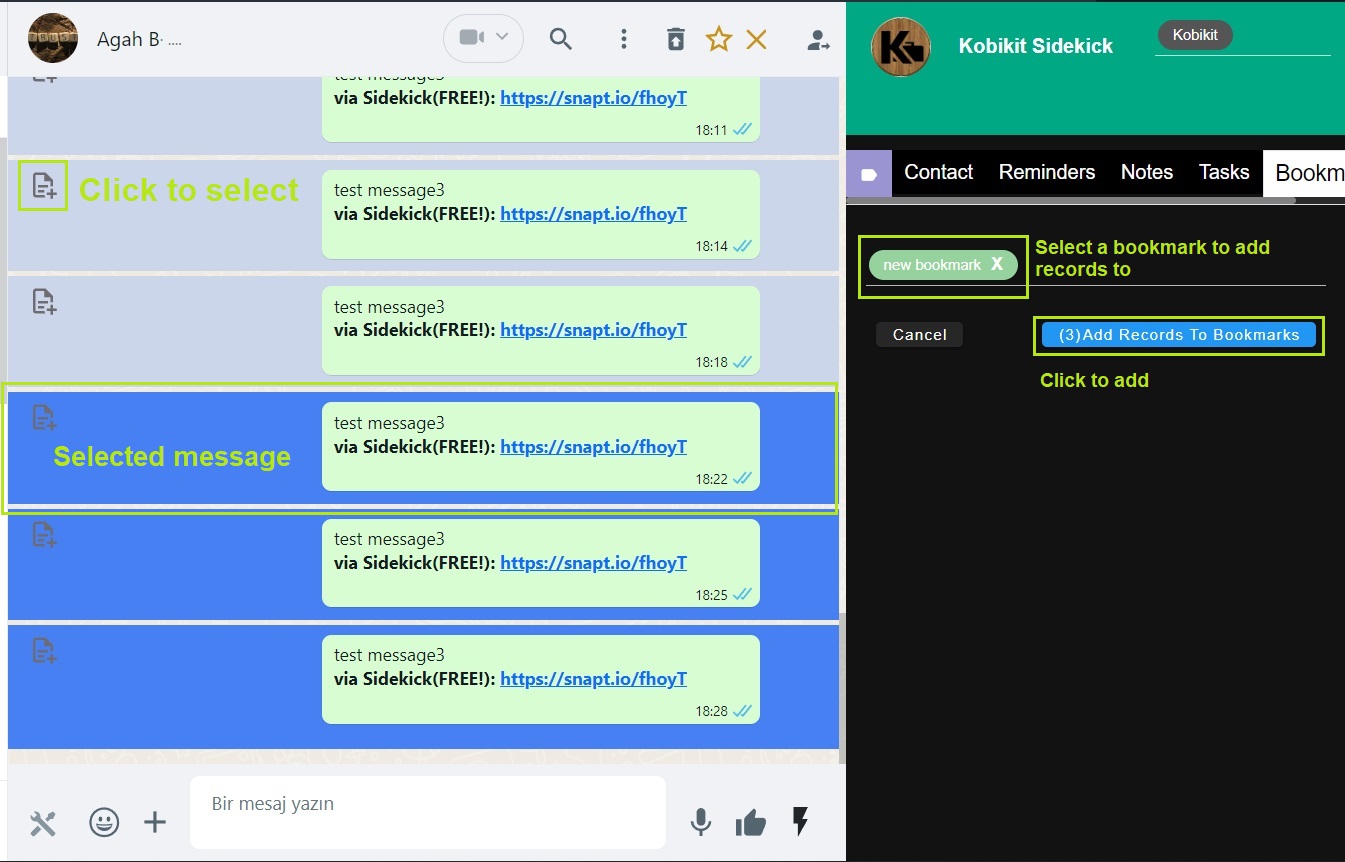
Image 2

Image 3
Bookmarks
Bookmark is a feature makes user store contact data, show them on simple graphic interface, search and find quickly.
Bookmarks can be created using sidebar on the right.
Select messages after clicking Add records button in contact Sidebar panel. Then select bookmarks which you want to add records to. (Image 2)
Record details and bookmark, folder edit panels are displayed on bookmark display modal window. This window open up on clicking icon on the left top (Image 3). If you want to see just records belongs to contact open Chat tools and click the same icon

Link shortener
Tasks feature let you assign tasks to your contacts.
Tasks can be created from both task modal window and sidebar by clicking + Add new task button.
You should select at least one contact to assign. Also viewers can see tasks but cannot edit.
Clans
Clans offer a unique blend of community building and progressive rewards(BETA).
Clan Growth Through Social Networking
Inviting friends: The primary method to grow a clan is by inviting friends to join the application. This process not only increases the clan's size but also enriches the social dynamics within the app.
Referring your email: People joins your clan by referring your email registering Kobikit Sidekick. Increase your clan member counts making people refer you and use Kobikit Sidekick.
Progressive Functionalities with Active Member Increase
Earning Future Access: A key feature of clans is the correlation between the increase in active member count and the unlocking of new functionalities within the application(BETA). It’s not just about having a large number of members, but ensuring they are active and engaged.
Enhanced Application Features: As the clan becomes more active, members are rewarded with access to advanced features. These might include special content, improved communication tools, unique customization options, or exclusive events.
Incentive for Activity: The system is designed to motivate clan members to stay active and engage regularly within the application. This active participation is crucial for unlocking future functionalities.